Changing your router’s IP address can help resolve network issues, enhance security, or simply refresh your network settings. Here’s a step-by-step guide on how to change your router’s IP address using a computer.
Understanding IP Addresses
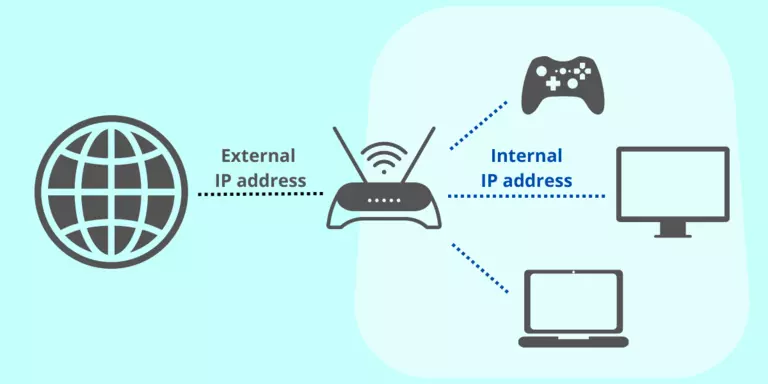
An IP (Internet Protocol) address is a unique numerical identifier assigned to each device on a network. Your router has a public IP address assigned by your Internet Service Provider (ISP) and a private IP address used internally within your home network. Changing the router’s private IP address can help resolve conflicts and improve network management.
Step 1: Connect to Your Network
Ensure your computer is connected to the network via Wi-Fi or an Ethernet cable. You need to be connected to the network to access the router’s settings.
Step 2: Access the Router’s Web Interface
- Open Your Web Browser: On your computer, open a web browser like Chrome, Firefox, or Safari.
- Enter the Router’s IP Address: Type the router’s IP address into the address bar. The default IP address is usually one of the following:
- 192.168.1.1
- 192.168.0.1
- 10.0.0.1
Press Enter. If you’re unsure of your router’s IP address, you can find it by checking your network settings:
- For Windows:
- Open Command Prompt by typing
cmd in the Start menu search bar and hitting Enter.
- Type
ipconfig and press Enter.
- Look for the entry labeled “Default Gateway” under your active network connection. This is your router’s IP address.
- For macOS:
- Go to System Preferences > Network.
- Select your network connection (e.g., Wi-Fi or Ethernet) and click Advanced.
- Go to the TCP/IP tab, and you’ll see the router’s IP address listed next to “Router”.
- Log In: You’ll be prompted to enter a username and password. The default login credentials are often:
- Username: admin
- Password: admin or password
If these don’t work, check your router’s manual or look up the default credentials for your router model online. If you’ve changed the password and forgotten it, you may need to reset the router to factory settings.
Step 3: Change the Router’s IP Address
- Locate the Network Settings: Once logged in, navigate to the section of the router’s settings where you can change the IP address. This is usually found under sections like Network Settings, LAN Settings, or Advanced Settings.
- Change the IP Address:
- Look for a field labeled IP Address, Router IP, or similar.
- Enter the new IP address you want to use. Ensure it’s within the same range as your current IP address. For example, if your current IP address is 192.168.1.1, you might change it to 192.168.1.2. Avoid using addresses that might conflict with other devices on your network.
- Save Changes: After entering the new IP address, save the changes. The router will typically need to restart for the changes to take effect.
Step 4: Reconnect to the Network
- Reconnect Devices: After the router restarts, your network devices may need to reconnect. Your computer will also need to reconnect to the network. You may need to re-enter the router’s IP address into your browser to log in again if you’re prompted to do so.
- Verify the New IP Address: To ensure the change was successful, you can log back into your router’s web interface and verify the new IP address.
Troubleshooting
- Can’t Access Router’s Interface: If you can’t access the router’s web interface after changing the IP address, make sure you’re using the correct new IP address. You might need to reconnect your computer to the router using the new IP address.
- IP Address Conflicts: If you encounter IP address conflicts, ensure the new IP address you choose doesn’t overlap with any static IP addresses assigned to other devices on your network.
- Resetting the Router: If you encounter issues and can’t access the router settings, you may need to reset the router to its factory settings. This is usually done by pressing a small reset button on the router for about 10-30 seconds.
Conclusion
Changing your router’s IP address can be a useful step in managing your network. By following these steps, you can easily update your router’s settings and resolve any IP address conflicts or security concerns. Remember to reconnect your devices and verify the changes to ensure everything is working smoothly.

Leave a Reply